MPPT Solar Charge Controllers Explained
What an MPPT controller does, the limits that matter, and how to match one to your panels and battery.
The charge controller is the part that turns whatever the sun gives your panels into a safe, controlled charge for your battery. In almost every home, shed or workshop system, it's an MPPT controller. This guide explains what an MPPT controller does, the limits printed on it, and how to check one against your panels and battery, with a worked example.
If you're still deciding between PWM and MPPT, start with PWM vs MPPT Charge Controllers. The short version: PWM suits one or two small "12V" panels on a 12V battery; MPPT suits almost everything else.
1. What an MPPT controller does
A solar panel has one voltage where it gives its most power, called the maximum power point. That point moves all day as the sun, cloud and temperature change.
An MPPT (maximum power point tracking) controller does three jobs:
- Tracks that point, adjusting many times a minute so the panels work at their best voltage.
- Converts the panel voltage down to suit the battery. Extra voltage becomes extra charging current rather than being wasted.
- Controls the charge in stages that suit the battery chemistry, so the battery is charged properly and not overcharged.
Because it converts voltage, an MPPT controller lets you wire panels in series for a higher string voltage, and use large home-style panels on a 12V, 24V or 48V battery.
2. Reading a panel label
Every check below uses figures from the panel's label or data sheet:
| Figure | What it is | Used for |
|---|---|---|
| Rated power (W) | Output under standard test conditions | Array size; controller current |
| Voc | Open-circuit voltage: the highest voltage, with nothing connected. Rises in the cold | The maximum input voltage check |
| Vmp | Voltage at maximum power. Falls in the heat | The minimum voltage check |
| Isc | Short-circuit current | The maximum PV current check |
| Temperature coefficient of Voc (% per °C) | How much Voc changes per degree. About −0.25 to −0.35 is common | Cold-morning voltage |
Series wiring adds the voltages. Parallel wiring adds the currents.
3. The two headline limits
MPPT controllers are often named by two numbers, such as 150/45: up to 150V from the panels and up to 45A to the battery. Both numbers must suit your system.
Limit 1: maximum PV input voltage. This is an absolute limit. If the panels' voltage goes over it, even for a few minutes on a frosty morning, it can destroy the controller. Check it using Voc corrected for your coldest morning:
Cold-morning voltage = Voc × panels in series × (1 + coefficient ÷ 100 × (coldest °C − 25))
Limit 2: maximum charge current to the battery. This is the controller's output, not what the panels supply. Estimate what you need with:
Controller amps ≈ array watts ÷ battery voltage, plus a margin
The same panels need twice the controller amps on a 12V battery as on 24V, and half again on 48V. That is one reason bigger systems use higher battery voltages. See 12V, 24V or 48V? Picking Your System Voltage.
4. The checks people miss
Three more limits are in every controller manual:
- Maximum PV short-circuit current. Strings in parallel × Isc must stay under it.
- Maximum PV power. Some makers allow more panel watts than the controller can deliver, and the controller simply limits its output on the sunniest hours. Others don't. Follow the maker's stated maximum PV power for your battery voltage.
- Minimum string voltage. An MPPT controller can only convert voltage down. On a hot day, a string's working voltage drops. If it falls too close to the battery's charging voltage, the controller can't charge properly. The MPPT Controller Size Calculator runs a rough hot-day check: Vmp × panels in series × 0.85, compared with the battery's charging voltage plus 5V. The manual gives the exact requirement.
5. Series or parallel?
With the same panels, you can usually wire them more than one way. Each layout has trade-offs:
| More panels in series | More strings in parallel | |
|---|---|---|
| String voltage | Higher: watch the maximum input voltage and the 120V DC threshold | Lower: watch the minimum voltage on hot days |
| Current in the panel cables | Lower | Higher |
| Shade on one panel | Can pull down the whole string | Affects only that string |
| Typical use | Longer cable runs from the panels | Partly shaded sites, lower voltages |
A string over 120V DC is no longer extra-low voltage and can give a dangerous shock. Panel wiring at that voltage must be done by a licensed electrician.
Cable sizes, fuses and isolators for the panel and battery sides are chosen by a qualified installer, to the makers' instructions and the relevant standards. This guide doesn't size them.
6. Battery matching and settings
The controller must suit your battery as well as your panels:
- System voltage. Many controllers detect 12V, 24V or 48V automatically. Others are set by hand. Confirm it before charging.
- Chemistry profile. Choose the profile for your battery, such as LiFePO4 or AGM, then check every voltage setting against the battery maker's data sheet. A lead-acid profile on a lithium battery can mean the wrong voltages and stages. If the controller has an equalise stage, never use it on a lithium battery.
- Charge current. Some battery makers set a maximum charge current. A large array on a small battery may need the controller's current limit turned down.
- Temperature. Lead-acid settings often use a temperature sensor to adjust charge voltage. Many LiFePO4 batteries must not be charged below about 0°C unless they have low-temperature protection or heating. Check how your battery and controller handle the cold.
- Talking to the battery. Some controllers and batteries can share data, so the battery's management system can tell the controller what it needs. It only works with combinations the makers list as compatible.
- Load output. Some smaller controllers have a load output with a low-voltage disconnect. Check its current limit; bigger loads go elsewhere.
For more on battery figures, see LiFePO4 Batteries Explained.
7. Worked example: the workshop array
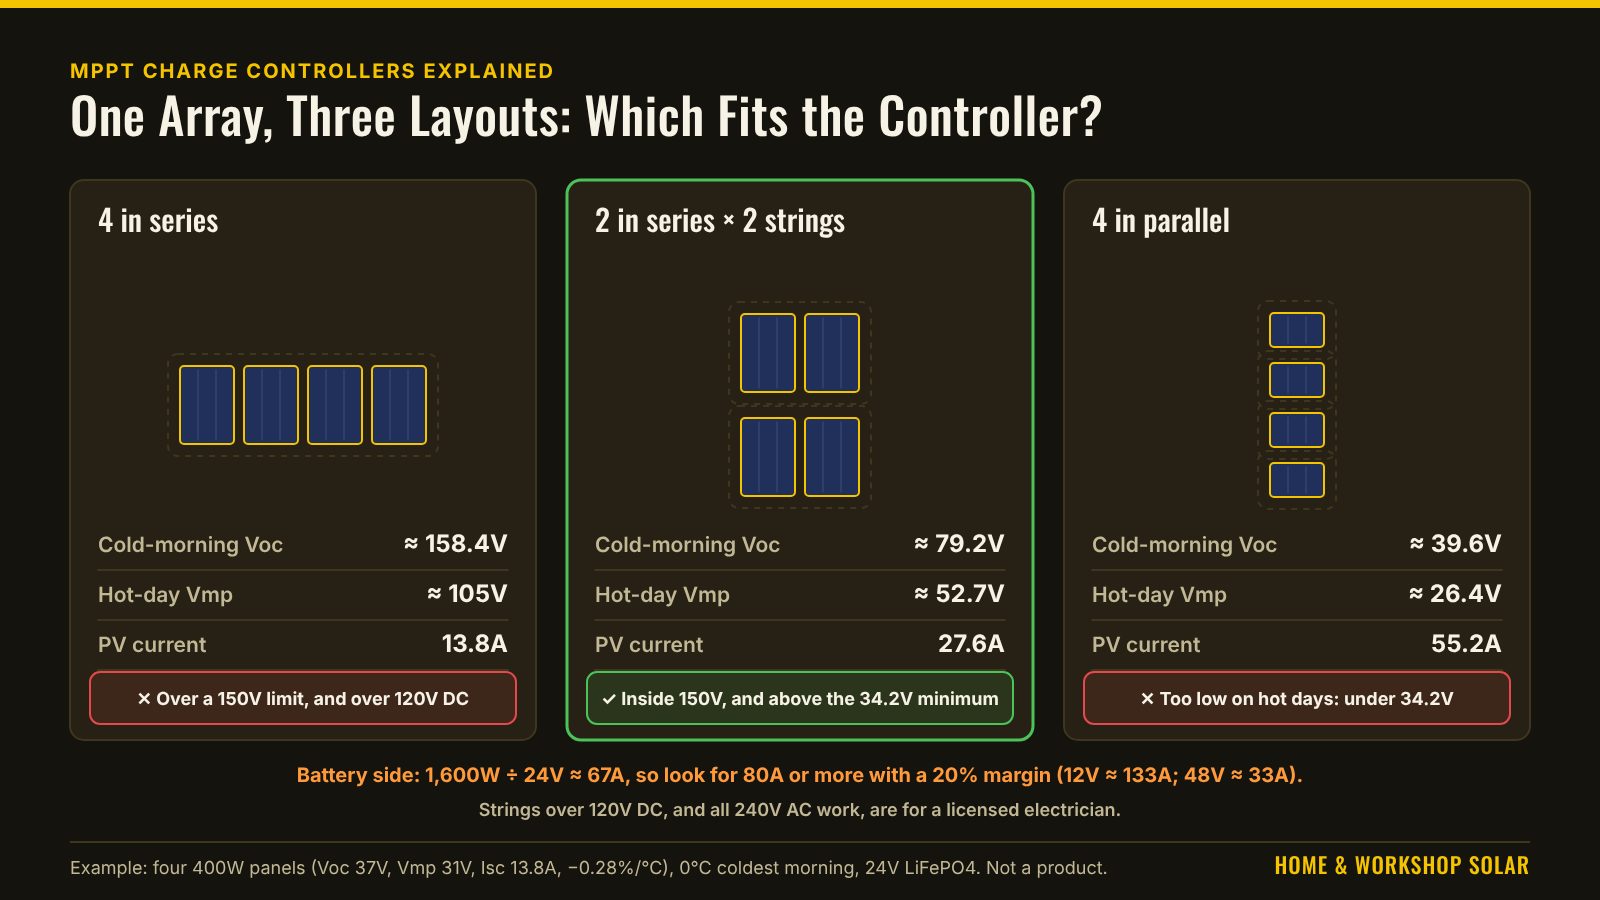
This continues the workshop from What Size Solar System Do I Need?: four 400W panels (1,600W) on a 24V LiFePO4 battery. The panel figures are the MPPT Controller Size Calculator's example 400W panel (Voc 37V, Vmp 31V, Isc 13.8A, −0.28% per °C), not a specific product. The coldest morning is taken as 0°C. Every figure is an example.
Cold-morning factor: 1 + (−0.28 ÷ 100) × (0 − 25) = 1.07
| Layout | Voc on label | Cold-morning Voc | Hot-day Vmp (× 0.85) | PV current (Isc) | Verdict |
|---|---|---|---|---|---|
| 4 in series | 148V | ≈ 158.4V | ≈ 105V | 13.8A | Over a 150V limit, and over 120V DC. Not suitable for a 150V controller |
| 2 in series × 2 strings | 74V | ≈ 79.2V | ≈ 52.7V | 27.6A | Within a 150V limit, well above the hot-day minimum (29.2 + 5 = 34.2V) |
| 4 in parallel | 37V | ≈ 39.6V | ≈ 26.4V | 55.2A | Too low on hot days for a 24V battery (under 34.2V) |
Battery-side current: 1,600 ÷ 24 ≈ 67A, or 80A with a 20% margin. On a 12V battery the same array would need about 133A, and on 48V about 33A (40A with margin).
What the example shows: two strings of two panels suits this array. You'd then look for one controller rated at least 80A to the battery, with a maximum input voltage comfortably above 79.2V and a PV current limit above 27.6A. Some owners use two smaller controllers instead, each with one string (800W ÷ 24V ≈ 33A, so about 40A each). Check every figure against the actual panels and controller, and use the controller maker's string-sizing tool.
8. Where the controller goes
- Mount it where the manual says, usually close to the battery, in a dry, ventilated spot and out of direct sun. Controllers make heat, and many reduce their output when they get too hot.
- Follow the manual's connection order and isolation instructions exactly.
- Keep it clear of anything flammable.
This guide gives no installation instructions. Mounting, wiring, protection and isolation must follow the manuals and the relevant standards, with qualified help.
9. If it isn't charging
Most controllers show their state on a screen, lights or an app. If the battery isn't charging, work through Why Is My Solar Battery Not Charging?. It includes safe stop points.
10. Quick summary
- An MPPT controller tracks the panels' best voltage and converts extra voltage into charging current.
- Check both headline limits: maximum PV voltage, using Voc on your coldest morning, and charge current, using array watts ÷ battery volts plus a margin.
- Also check PV short-circuit current, maximum PV power and the hot-day minimum voltage.
- Choose the series and parallel layout to fit inside all of those limits.
- Set the chemistry profile and every voltage to the battery maker's figures.
- Strings over 120V DC, and all 240V AC work, are for a licensed electrician.
These are planning estimates. Real results depend on your location, weather, shading and the gear you choose.
Safety: in Australia, any work on 240V AC wiring, including connecting an inverter, battery or solar system to a home's switchboard or fixed wiring, must be done by a licensed electrician. Grid-connected systems also need approval from your electricity network. Panel strings over 120V DC must also be wired by a licensed electrician.
Handy gear
These are examples to compare, not a recommendation for your home. Check any model's data sheet against this guide.
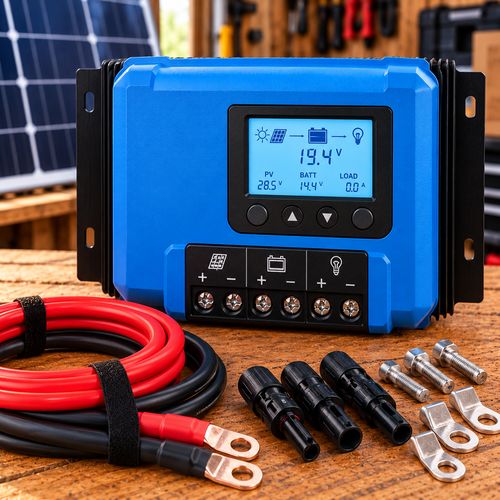
MPPT charge controller
Compare the maximum PV voltage and charge current with your own array and battery.
Check Price on AmazonAs an Amazon Associate I earn from qualifying purchases. Prices and availability are shown on Amazon.
Related guides
PWM vs MPPT Charge Controllers
What a charge controller does, how PWM and MPPT controllers differ, and which one suits your panels and battery.
Read guide →
12V, 24V or 48V? Picking Your System Voltage
Why system voltage matters, how it changes the current and cable size, and which voltage suits a shed, workshop or home.
Read guide →